

A man is not old until regrets take the place of dreams.
John Barrymore
Aug 30, 2010
Aug 26, 2010
Key Holder
IT’S TIME TO CELEBRATE!!!! I finally completed one of my projects for Tim!!!
While out junking with friends, I’ve been collecting “treasures” to put in my new craft room. One of the pieces I found was this cool metal (of course) key holder with all the numbers still on there except for one. I thought it would be fun to put some old keys on it for my room.


When I was looking at the fun products Tim sent I saw the paper with all the old pictures and knew I wanted to use it to help tell a story for this key holder.
I love the history you preserve when you find “old treasures” to repurpose, and since I’m becoming an “antique” the older I get – I tend to place more of a value on old pieces!
The key holder makes me think of all the people who lived in some apt. place where this piece might have held the spare keys to their lives. What were their names, their jobs, where were they from, how many children, etc. I loved thinking about how each person in the different apts. might have affected one another's lives, so I decided to make it a collage so I could show the connection.

I loved that the numbers were already shaded with time, and the one that didn’t have a number on it was a blank canvas. I used 4 different size hardware nuts to help me achieve the different heights to back the pictures. It’s hard to tell in the pictures all the different layers.

I had the top metal piece in my “junk jar” where I store smaller metal treasures. I wanted to be able to add some words or a quote that tied everything in.

Keeping with the theme of the keys – I added the door plate. I love how it stays with the theme.


How can you go wrong with a cool, unique key holder, some rusted metal and Tim’s great vintage pieces? Loved how it turned out and excited to finish up the next project!
Renee
Products used:
Tim Holtz Idea-ology Lost and Found Paper
Tim Holtz Idea-ology Keyholes
Tim Holtz Idea-ology Word Keys
Tim Holtz Idea-ology Ornate Plates
Tim Holtz Ranger Distress Inks - Black Soot, Peeled Paint and Antique Linen
Scotch ATG 700 tape
Liquid Nail Glue
Quote- Printed on Close to My Heart Adhesive-Backed Twill
Brown Ribbon – May Arts
Small Variegated Ribbon – Fiber Goddess
Nuts from the hardware store
Flower – one from my collection – sorry, don’t remember where I got it!
Aug 25, 2010
Organizing Tim Holtz products!
Happy Wednesday!!
It's Rhonda and I have to tell you how excited I was to get the Upper Tier for my Clip It Up Mini! Do you ever work on a project and just know you have that perfect embellishment somewhere, but then can't find it? I know that it happens to the best of us, and certainly to me! One of my favorite go to embellishment manufacturers is of course, Tim Holtz and his entire Idealogy line.
I decided to take these out of the drawer that I had them in and put them on my new upper tier so I could find them quickly for my projects. Guess what I discovered in that process... yes, I have a few duplicates... *sheepish grin*. I really love using the Clip It Up base to display my cards, it's a great reminder to send one out!

Earlier this summer I purchased a few different picture frames to have on hand for altered projects. My cousin is getting married and I wanted to create a pretty frame for the happy couple using their wedding colors, pink and grey. The fun part about this frame is that the flower on it is actually a recycled decoration from one of our beautifully wrapped wedding gifts! I had fun stacking the chipboard embellishments on top of one another to create my own custom look.

Do you have ideas for how to keep your embellishment collections organized? We would love to hear your awesome ideas!!! Be sure to stay tuned for my next post, I have an awesome new Clip It Up product to show you... The Floor Model is here!
Thanks for spending a moment with us today, have a super scrappity week!
Aug 24, 2010
I haven’t forgotten you Tim…
I feel really bad I haven’t posted anything for Tim yet! Before I could start working on any projects, I first had to get all my supplies back into my craft room. I’ve been working on my room forever (at least it seems that way)! All my supplies have been boxed up and stored way too long and I really needed them!
I now have most of my supplies organized, categorized and put away in their new home and my room is 90% ready! As I’ve been putting things away and getting out my “treasures”, I’ve picked a couple of things I think will be some fun projects to start with.
First of all I took one of my Under the Shelf Rods and had my “handy welder” (I’ve worked with him on several projects) make a shelf with a rusted metal part I found so it would fit with the antiques for the room. I then hung most of the product Tim sent me. Now I can visually look at them as I work to help get the creative juices going.


I know I’m weird – I love old, rusted metal!!!
I put the fun tools he sent into a cute little tin and I’m using that as one as of the projects - so you’ll have to wait a little bit longer for a look at that.
Hopefully I’ll have one or two projects finished for you tomorrow with all of Tim’s GREAT products…
Renee
Aug 23, 2010
Aug 20, 2010
The Battle of Organizing Photos
Hi, everyone, it's Joan, with my first post for Clip It Up. I'm so happy to be part of this team because I love to scrapbook and organize!!
My scrap room is divided into areas for all the different projects I do, such as scrapbook pages, collage, card making, ATC's, sewing, etc.
One of the most difficult things for me to organize are photos. From carts to boxes to a large case with dividers, I've tried it all! Nothing worked well for me and my pictures ended up in piles on tables and the floor. I spent hours searching for the photo I needed for a layout.


Enter the Clip It Up Under the Shelf Rod and FINALLY - my photos are organized!!!
I used Clip It Up zip bags to group photos for scrapbooking by child (subdivided by their activities), nature, pets, etc. Any picture that I wasn't using for actual scrapbooking went into a photo album.
This is what the finished shelf looks like.

Now when I need a photo of my daughter, I simply pull out the bag and take out the picture I want. I love the Clip It Up Under the Shelf Rod and the new photo area I've created with it!!
I made the canvas on the shelf using a photo of my daughter. First I cut her out of the picture. Then I painted the canvas with gesso, let it dry, painted blue acrylic paint on the edges, then misted it with glimmer mist. Next, I layered patterned papers, lace, rhinestones, wings and flowers I cut from paper. The word Lovely was cut from my Revolution.

I look forward to more organizing in the months to come!!
Aug 19, 2010
Welcome Joan!

My name is Joan Liddle and I live in northeast Ohio with my husband, daughter (in college) and our chihuahua. I am a first grade teacher who loves to do all kinds of artwork. I make cards, ATC's, altered art, mixed media art and scrapbook. I usually work in bright colors with a single photo on my layouts. I love to organize and have lots of ideas for using the Clip it Up!
Joan
Joan’s first post will be tomorrow. Come back and check it out!
Aug 18, 2010

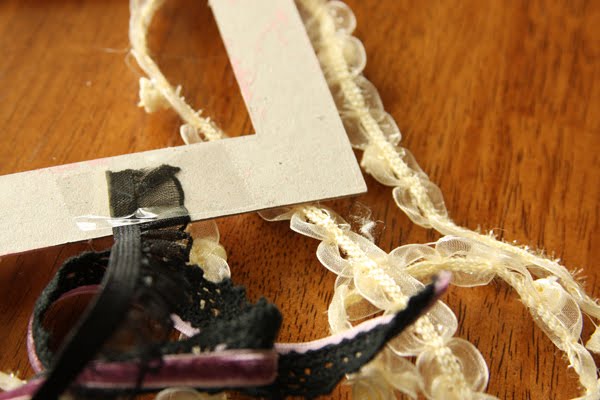
The Problem of Trim
All I can say is....why didn't I get one of these sooner! Here is the 36" Ribbon Organizer that I got a couple of weeks ago. Right now, I am using in on my table before I move into my new scrap room and it works this way too! Only problem is that you can't use the bar below for your clip-it-up needs until you hang it on the wall.

If you're anything like me, you love to buy trim by the yard, and you have quite a bit of it, sitting in a tub somewhere! When I got my Simply Renee Ribbon Organizer, I immediately thought of my trim. How could I organize my trim in an attractive and practical way?

Well, I am happy to say that I do have a couple solutions to share with you and a mini-tutorial on altering your trim.
1. Create Your Own Ribbon Rolls
2. Wrap Your Trim Around Existing Ribbon Packaging, or Make Your Own With Chipboard
3. Misting Your Trims Ahead of Time With Colors You Love
HERE IS THE MAKE SHIFT RIBBON ROLL:
Supplies:
Paper Towel Roll
Tape
Trim
Scissors
Labels (optional)

Step 1: Depending on the width of your lace/trim, but a piece of paper towel roll a little larger than the width of your trim.

Step 2: Tape one end of your trim to the roll and start rolling it up!

Step 3: If you like to keep track of who makes what product, then simply print out a label and paste it on the inside of your new roll.

Another example:

Step 4: KEY to this working....you will need to place your hand made rolls in between regular ribbon rolls to keep them in place. See below for example.

Now that we have one solution for trim, let's get to another one! This idea uses the clip-it-up section of the Ribbon Organizer.
WRAPPING TRIM IN STYLE:
Supplies:
Large Chipboard Pieces
Acrylic Paint
background Stamp
Staz-on Ink (or other)
Trim
Tape
Step 1: Decorate your chipboard piece by painting one coat of acrylic paint, let dry, then stamp a background stamp with Staz-on ink.

Step 2: On the back, start taping your trims, and wrapping them around the chipboard one by one. Keep in mind that your clip will need to go in the middle to keep it hanging straight.

Step 3: Continue until you have covered your chipboard. Use tape or a pin to secure the ends of your trims, whichever you find easier. You are now ready to clip-it-up to your Ribbon Organizer in style!

AND you can also use old ribbon packaging boards, DON'T THROW THESE AWAY! I took some Christmas ribbon on a board from DCWV and just wrapped on my own trims. These boards are made for ribbon, so you should remember that you can hold on to these for your Ribbon Organizer.

The Final Look:

And now onto a little tip. I tend to buy white or cream trims and laces because I like the flexibility I have to spray them with whatever color I need, now that Glimmer Mists and Shimmerz sprays are available.
ALTERING YOUR TRIM/LACE:
Supplies:
White/Cream Trim/Lace
Glimmer Mist or Shimmerz Spritz Sprays (or similar)
Old Box
Step 1: Lay your trim/lace down on the inside of an old box and cover with glimmer mist of your choice. You can try blending 2 colors if you like!


Step 2: Hang to dry over the box.

Step 3: Roll onto your own ribbon roll and be prepared to use your newly colored trims and laces on your projects.

And here is an example of using the trims and ribbons on a layout. I like to stack them for a little more texture!

Below is a close up of the trim I sprayed with Glimmer Mist (the blue one and the brown one).

I like to place my title on top of lace and ribbon to create more dimension.

Hope you had fun reading and hopefully you found some useful organizational tips!
Layout Supplies:
Paper: My Mind's Eye, Bo Bunny, 7 Gypsies
Trims: Prima
Ribbon: Offray
Rub-ons: Basic Grey
Mist: Tattered Angels Glimmer Mist
Stamp: Unity Stamp Co. (Memory Block)
Ink: Tsukineko, Ranger
Letters, Flowers and Pebbles: Prima
Aug 17, 2010
Getting My Organization On With Renee!
Hi Guys,
Bree here!
I thought the best way to introduce myself
was to make a little home movie of my
SCRAP SPACE!
You can learn alot about a girl by her organizing styles.
This is Part 1,
So tune in for part 2 coming soon.
So come and check it out.
With the Clip It Up...
There are so many possiblities to get you
Craft Space in Order...
And I'm going to share some with you.
Welcome Lesley!

I am a married Mom of 3 kids. I am currently a stay at home Mom, home with my little 7 month old. If I do go back to work come Oct 2012, it will be to the Government of Ontario, working in Postsecondary Education Policy.
As for my scrappy life, I have had the opportunity to work with some great people and companies. I also had the opportunity to design rubber stamps for a time with Cornish Heritage Farms. I teach scrapbooking, card making, and stamping locally in Burlington, and have in the past created on-line tutorials for design teams, usually technique based around stamping/ink or layout design. My next adventure is to create video tutorials. I just started up a Tutorials blog which you can see here: http://lesleylangdontutorials.blogspot.com
My scrapbooking style for the most part is shabby chic, but can change with my mood. I usually I start with a great image and work from there. I tend to lean towards lightly distressed/imperfect patterned papers and always reach for ink on any given project. Let's just say my fingers are always covered in ink by the time I'm done. I like to add texture and dimension, rip, tear, smudge, etc. Every once in a while, you will see a nice and clean layout/card from me. I appreciate its simplicity and crisp look. My new favorite toy is the Silhouette die cute machine, which can be used to dress up layouts with patterned paper cut outs. I work with Photoshop and digital elements quite frequently.
I can make anything and everything. I am not happy to stay in just one medium or paper craft. I play around a lot, and love to create 3D projects, cards, scrapbook pages, handmade gifts, canvases, altered items, jewelry, gift packaging, etc...
Leslie
We’re excited to have Leslie on our team. Watch for her first post tomorrow :-)
Simply Renee Inc
Aug 16, 2010
Aug 12, 2010
Welcome Bree!

My style of scrapbooking would definitely be characterized as eclectic. I love to mix and match patterns, colors and different styles into my work. Each and every project is inspired by something different. Sometimes it’s the photo and sometimes it’s the event I want to remember. Sometimes it’s a store window or advertisement, and sometimes it’s the gorgeous papers and embellishments that move me to create. I am passionate for patterned paper and love to use unique, recycled or thrift store finds in my work. I love to create layouts that tell stories, whether its with pictures or words. My newest passion is card- making. I love creating little pieces of art to give to others. I also enjoy creating sketches for card making and scrapbook.
Bree
Welcome Bree- we’re excited to have you on our team. Her first post will be tomorrow :-)
Simply Renee Inc
CHA Projects
Another project I did was a book for G45 with Diane’s Alice in Wonderland/Halloween line. I had a great time working on it! I had this rusted, old door faceplate and I knew I wanted to use it for the spine of the book. I haven’t done anything like this for 4 years, and all my craft items are stilled stored while working on my new room. A bit frustrating – but so much fun.


I also did a gift bag with the Steampunk line. The card pulls out on top so you can write on it. Loved the little clock gears on it, hard to see in the photos, but they really added some dimension.


It’s so easy to create something beautiful when you have such great stuff to work with. Thanks Diane for your friendship and the opportunity to “be creative” again!
Renee
Aug 11, 2010

For all the Quilters…let’s get organized!
Hi this is Jenifer and I am so excited and honored to be posting my first DT post with Simply Renee. This team has so much talent and there is just so much to learn and absorb from them.
I received the Clip it up Jumbo and it was perfect for me. I am a multi-crafter. I sew, quilt, scrapbook, crochet and do several different things. For me it has always been very hard to organize all my different hobbies in the same small space and keep it functional. The Clip it up Jumbo is big enough to hold my patterns, works in progress, rulers, fabric and inspiration all in the same little space.

When I quilt I move everything out to the kitchen table it gives me much more room. I was thrilled to just move my Clip it up Jumbo right along with me. Everything was all in one place and and I had everything right at my fingertips.

I had everything right at hand when I made this pinwheel quilt top with prairie points, I wasn’t making trips back and forth to my room for things I had forgotten and that saved me so much time.

In fact I was so organized that I knew how much fabric I had and put together another quilt top in no time. This second quilt will be quilted with cute little daisy flowers with the circles in the center. I can’t wait to finish this one up.

I had so much fun with how organized I was that now I just need to quilt my quilts. Maybe I will show those in my next post. I hope this will help some of the sewers out there that need a solution to keeping things at hand.
Jenifer
Subscribe to:
Posts (Atom)


