Oh the joys a craft space can bring! Hi Everyone I’m Erika Taylor and I’m so excited to take you all on a tour of my crafting space. It is a tiny space measuring in at 5’9” x 9’3” but it is all about how you use the space that matters. So let’s go for a tour shall we. Come on in. From the bi-fold doors, this is the view you’ll see. The room was originally the back entrance to the house, but the owners before us made it into a sewing room, so my vision of a craft space wasn’t far off.
 When you have a small space, using both horizontal and vertical space is so important. Make the most of the space you have right? Now let’s get into the corners and crevasses that make this room work for me. First, the built in shelves that carry all my alterable, markers, extra inks, tools and almost anything in a bottle (glues, gesso, crackle mediums etc). The top shelf is fabric and my light box.


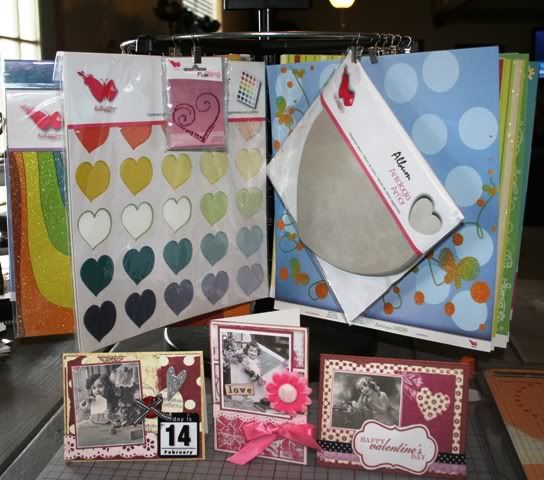
My stamps are organized in binders by manufacturer mainly, although I do have a miscellaneous album too. Most of my stamps are acrylic or cling mount but I do have a little treasure trove of wood mounts too, which you’ll see in a few photos.![clip_image002[4]](https://blogger.googleusercontent.com/img/b/R29vZ2xl/AVvXsEha1pxh0nSz1LlpSKNu-MECIiSqT6WRh3CgD2k5LG08iqNarSUM332mbkf64DExKIXQoC0C-aCMwGqdkQiArvA5NEdG8vqzUC5Q07CGhwrPtgNOwTM5tj1Xfig1UvJE5XBildI8B2fSNNEQ/?imgmax=800 "clip_image002[4]") Two tables make up my workspace and are filled with tons of things that I consider necessities. This great 3 tiered unit holds all of my alcohol inks, stickles, Distress Crackle paints, and most used embossing powders. And each tier spins. Gotta love that!
Two tables make up my workspace and are filled with tons of things that I consider necessities. This great 3 tiered unit holds all of my alcohol inks, stickles, Distress Crackle paints, and most used embossing powders. And each tier spins. Gotta love that!![clip_image003[4]](https://blogger.googleusercontent.com/img/b/R29vZ2xl/AVvXsEilWuTE3FV676EOIOp40Jmwu49ZG6dUd_iMPjrCkmxHg47MX-jTT1i9Jd14V_8O4RLKcipf2xkXYRWhRkODOgjVQT11VxCVEmwAJ4t2xC3cyBpRHrFj7c6nL5Ch2sFwY350MHRXtfulordA/?imgmax=800 "clip_image003[4]") Then there is my love affair with Shimmerz paints. I’m a very visual crafter, so I need to have things out in the open in this space. Right beside the Shimmerz is my ever growing Glimmer Mist collection.
Then there is my love affair with Shimmerz paints. I’m a very visual crafter, so I need to have things out in the open in this space. Right beside the Shimmerz is my ever growing Glimmer Mist collection.![clip_image005[4]](https://blogger.googleusercontent.com/img/b/R29vZ2xl/AVvXsEifsjJjcm7g8z6GzDVPF0KP7b2pyy98euzOCDgG4GOzZkKaD1fCh79rezI1wPMNUbQMsblaG7_Z6CQ9soagLyDLCi0D_9ZxiQVJhy8ZmA8O_8rWXO3eEW1_pyeLk-UGOIZhVWgjPp7Th40K/?imgmax=800 "clip_image005[4]")
 I’m looking for a better way to organize my ink because my ink has been like a few rabbits. Once you have a few, you’ve got hundreds. Oh how I love ink. Chalk ink, Staz-on ink, Distress Ink…the list could go on and on and on. Right now the ink stays on a little shelf right above my workspace, but if it stays there it will start looking much like a skyline. Huge towers of ink!
 The second table holds my Big Shot, metal pieces, jars of small embellishments like brads and eyelets, and a pair of bird watching binoculars. With the small window in the space, I can hear the birds in the yard, so I’ve got to be ready for them. You’ll also find my newest creations on this table waiting for photo studio time lol. You’ll notice in the bottom left corner a basket full of stuff. This is my open stash storage and it is the one thing that drives me batty. I think a Clip it Up with baggies should fix the problem.
  Now onto the supplies wall. I love slat wall. It displays everything so nicely and everything always has a home. Is that a Clip it Up Ribbon Organizer I see??? All of my packaged embellishments are hanging in groups. Chipboard, Grungeboard, bling, borders, flowers, etc. Every time I walk into my craft space, this is the first thing I see and makes me feel like I’m in my own personal craft shop. Uber cool.
 Alright so off to see what is to the right of where I sit and create. A full sized Billy Bookshelf stuffed with inspiration, books, magazines and my wood block stamps and fibers. Little jars holding strands of texture, color coded goodness, like the rainbow.
 Behind my workspace there is a small Expedite bookshelf lying on its side that stores a plethora of jazz. From bubble wrap to magazines, paper packs to punches and everything in between. On the top is my cutting station and cardstock paper storage. Above that you can see more coloring and painting mediums. Have you come to the conclusion that I like to color? Since I was 3 and that hasn’t gone away. I still grab a coloring book with my children and color away. I can even stay in the lines now. Practice, Practice, Practice!!


I’ve got a great solution for scrap paper pieces. This unit holds all of my scraps and every drawer is for a specific color. Reds, Pinks, Oranges, Yellows, Greens, Blues, Purples, Whites, Blacks, and Metallics. Now if I can only remember to open these up a little more instead of putting a full piece under the knife.

One of the smartest uses of space for me, in this tiny area, was attaching magnetic knife racks to small areas like the corner and directly above my workspace. These little gems are super inexpensive and hold my Spellbinders Dies. LOVE IT!!!!

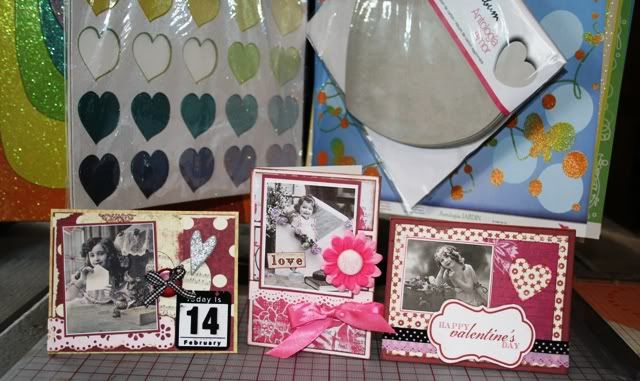
Are you all still with me? Only a few photos left to go. It is amazing how much you can fit into such a small space isn’t it? Since I make so many cards every year, there has to be a spot to keep them all. Two aluminum photo boxes that have been altered then tabbed with occasions and dates for an easy way to find an appropriate card.

My newest addition to my craft space, I just had to save for last. Let me tell you I had ribbon all over the place and for me, if it isn’t organized I just don’t use it. So here is the newest member of the Taylor craft room family, The Ribbon Organizer. All the ribbon I get from Really Reasonable Ribbon fits so nicely on this dream of an organizer. The next step is to alter it. How fun is that!?!
 Thank you so much for sharing this time in my craft space with me. I hope that you have enjoyed it and you’ve gained a few ideas on how to make your space work for you. Share with me a picture of your favorite part of your craft space or the space that makes you go batty. I’d love to see those pictures.
Until next time… Toodles
Erika Taylor
http://taylordconcepts.blogspot.com


![clip_image002[4]](https://blogger.googleusercontent.com/img/b/R29vZ2xl/AVvXsEjhuZ864HgDTcPgAgqPR7ZjtviUTZExyF3sLJFBZgSU-1xvjMJgYTsPcw773nezz5S9-26ZABoVgmw8gmlihuF8_rddkrF-n8fyBKpo5DdtNfh-Ru0jvmZfAxizMHUv7bnO5dTVDPStW4A4/s1600-h/clip_image002%5B4%5D%5B3%5D.jpg "clip_image002[4]")
![clip_image003[4]](https://blogger.googleusercontent.com/img/b/R29vZ2xl/AVvXsEg__gegMHMTWh3RTYXAs7AbYscDyaXmw2XlH3alZveXXHQ3_h5oPwzFo-prPYRUo8xXRuukmFsFd5tsftmALev8P-f4FKyenqTeXd9d27Xz-jmkYkUq-btJnyNEGGeJgF5JUF_1umBgiBcl/s1600-h/clip_image003%5B4%5D%5B3%5D.jpg "clip_image003[4]")
![clip_image005[4]](https://blogger.googleusercontent.com/img/b/R29vZ2xl/AVvXsEiIap0rFdaZ0zJnnnLX5STCZnsZiAVjFmazSslNpcQiEV1lzxc12QXxxSMG7eQZYkib5gulE1aelxJeZeyukbcGVFV9_a4X-fWERjkL99_YBTuoOzJ9EaAuDy4p1AXBmk-4Elgg-tIwM0FO/s1600-h/clip_image005%5B4%5D%5B4%5D.jpg "clip_image005[4]")


