Apr 29, 2011

Altered Clip It Up Products- Vintage & Grunge Minis

Hi everyone! I am so excited to share my altered Clip It Up products with you today. I had so much fun altering them! I hope you like them. :o)

image

First let me tell you a little bit about this product. Both of these are Clip It Up Minis with Upper Tiers. When I received my box from Simply Renee, I immediately tore it open with excitement! I was so anxious to assemble it and start clipping my supplies up! I
literally put my Clip It Up Mini together in less than one minute. The ‘clipping up’ part took longer because I had so many products to put on it. I decided to fill my mini with supplies before I altered it to familiarize myself with the product. I wanted to make sure
that my planned alterations would not compromise the functionality of this wonderful product.

In the past I stored all of my bling and flowers in plastic boxes. Although boxes are pretty, they are not the ideal storage solution to suit my needs. A box is the perfect solution for items that will be put away and stored for a long period of time. This was not the right organizational system for me. For products I use frequently, I needed a better way to store and easily access my supplies. Since I only have a few hours every evening to craft, I needed the best organization system possible to prevent me from wasting valuable time. I would literally waste at least an hour just searching for the products I planned on using. I remember feeling frustrated after my long search for supplies which caused me to lose the desire to create.

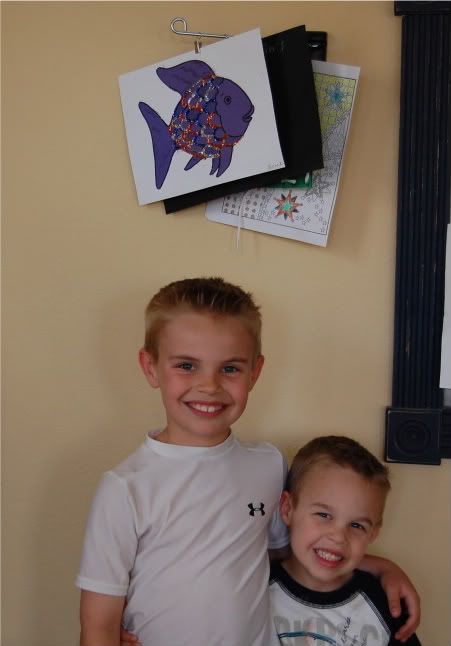
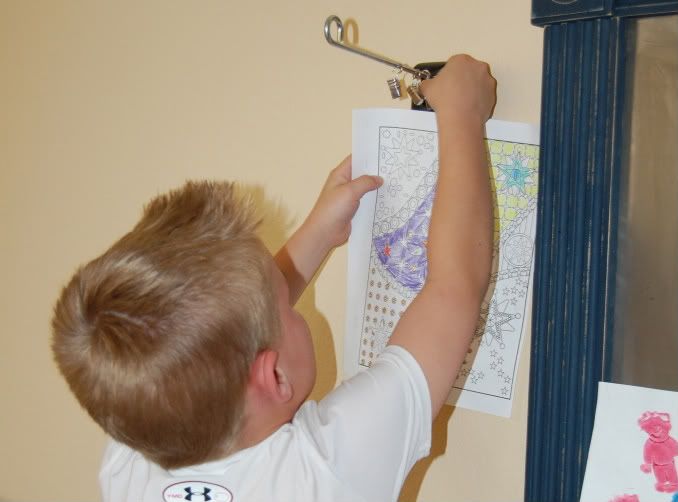
Another drastic change I noticed was the reduction in clean-up time. When I used boxes, I dreaded the clean-up process because I would complete a project and find my floor completely covered with open boxes. With the Clip It Up, it only takes a few minutes to clip my supplies back up! (My two young children even enjoy doing it for me!)

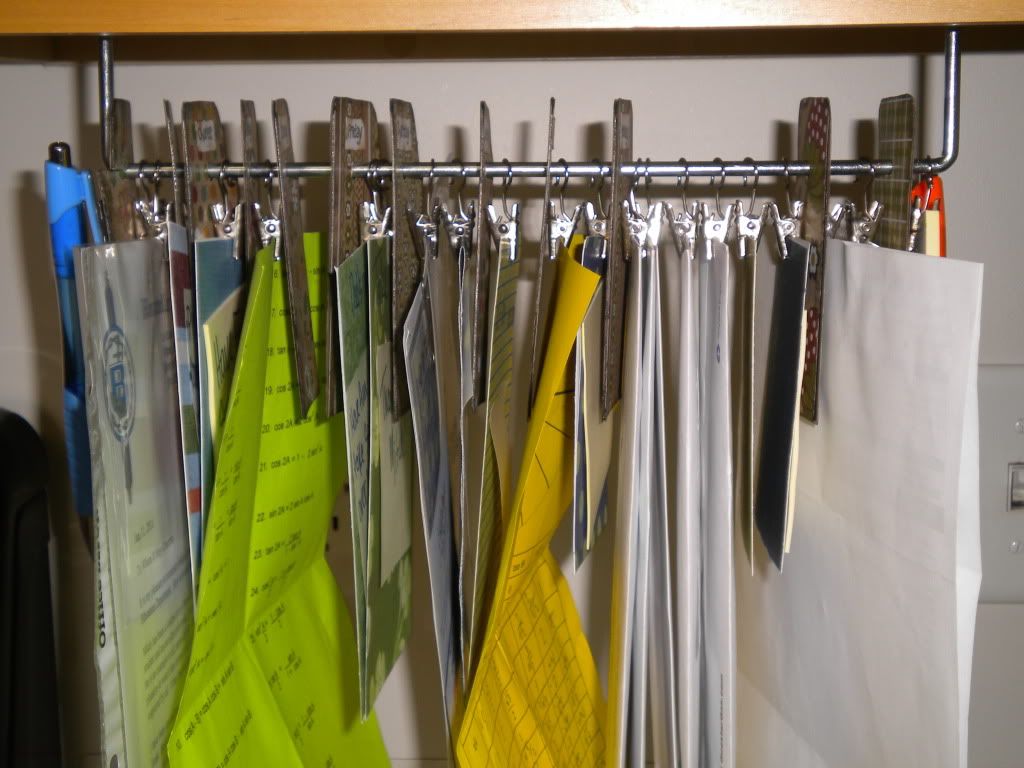
The Clip It Up comes with clips and divider tabs, making it easy to organize your stash. There are also optional accessories sold separately such as the Clip Grips, Storage Cover and my favorite... the Zip Bags. The Zip Bags are fantastic! I keep loose items in my Zip Bags such as pieces of bling that were cut up and left over, small chipboard elements, etc. I have seen others use regular Ziploc bags instead, but to be honest, I prefer the Clip It Up Zip Bags because they are much sturdier and hang better which
makes it easier to flip through my supplies. The ‘zip’ closure is also on the side of the bag which means that I do not have to unclip it to open it.

Can you believe I was able to empty out FIVE boxes of supplies onto ONE Clip It Up?! I was amazed at how much fits onto this small product! I was so happy to be able to see all of the products that I own. I also noticed that I had duplicates of many items
because I had no idea I had already purchased them! With the Clip It Up, I know exactly which products I have and will no longer waste money on buying the same item twice.

I now own several Clip It Up products and all of them are very light-weight and sturdy. They are easy to move from one location to another. They are also very easy to disassemble, making it perfect and convenient to alter. Let me show you just how easy
it is!

For my vintage Clip It Up, I added lacing to the top of the base. To do this, you must first drill the holes.

image

You will notice that beneath the base there are plastic divisions that support the base. Please keep this in mind when drilling your holes.

image

Using the faint markings on the top of the base as a guide, I taped on strips of paper (created using a border punch) to mark my holes. I drilled the holes using a 1/8 inch drill bit. Just a quick side note- the Clip It Up box you see beneath the base is excellent
for many different uses. I use it to mist, paint, emboss etc. So don’t throw it out! :o)

image

The first step is to paint your Clip It Up. I found this great paint at my local craft store that is a metallic paint with a stone texture. Paint each part of the Clip It Up and allow them to dry thoroughly. If desired, apply a coat of clear gloss as well to protect the painted surface.

image

The rings were painted a gold color using Rub’n Buff. Apply the medium to the ring and then gently buff to a luster.

Once all of the parts are dry, reassemble the Clip It Up. Now comes the fun part... the decorating!! There are so many possibilities! First let me show you how I altered my
vintage Clip It Up.

image

I added eyelets to the holes I drilled and used lace for the lacing. The chipboard elements are all made by The Dusty Attic. Each chipboard piece was inked and decorated with a little bling.

image

The pole was wrapped in lace and adorned with mulberry flowers. The tri-arms were also wrapped in lace. Remember to decorate each piece individually, otherwise, the arms will not turn.

image

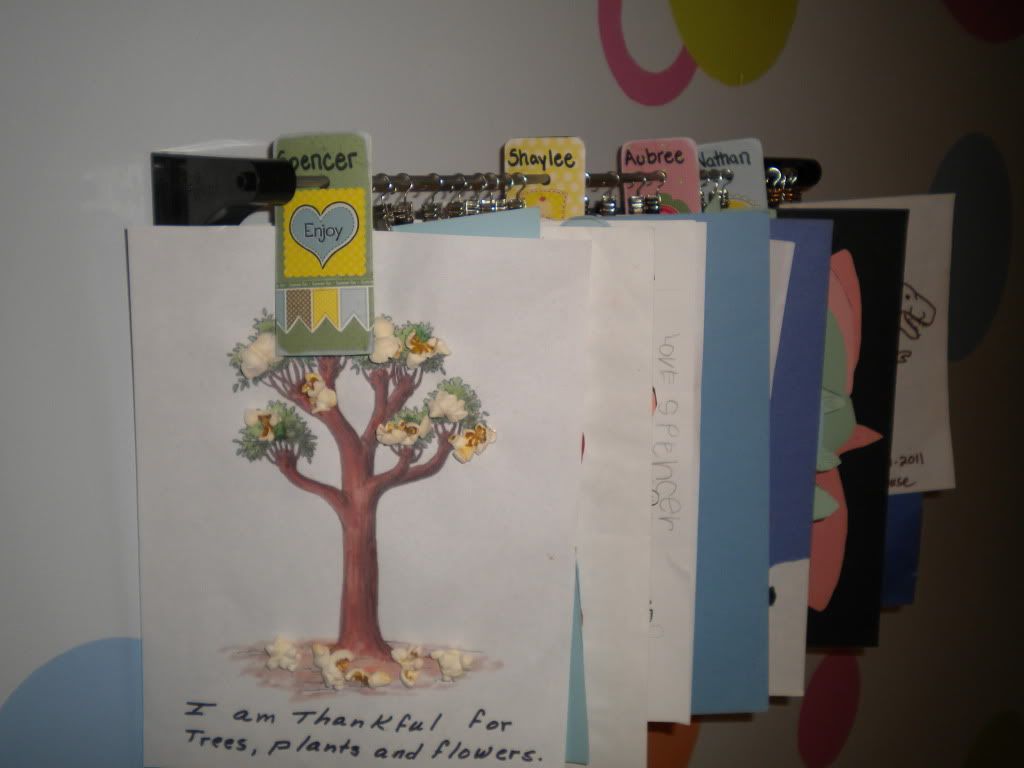
The divider tabs were decorated with papers from TPC Studios to coordinate with my vintage theme.

image

Here is a glimpse of the top of the handle. I kept it simple because I wanted to be sure I would be able to grasp the handle to transport my Clip It Up.

image

VoilĂ ! The finished product! I have all of my Prima Flowers hanging on this Clip It Up. It is now so incredibly easy to find the right color or flower that I need.

After altering my first Clip It Up, I felt the urge to alter another! But this time I decided to make it grungy! Check back next Friday and I’ll show you the details of my second one.

Natasha

Apr 27, 2011

Fun with Echo Park and Tips on Organizing Spellbinders Templates

Hello everyone! Tina here with a quick post to give you some tips and ideas on making the most of your crafting space!

I had the honor of being a guest designer for a fabulous kit club called “My Scrapbook Nook” for the month of April. I created this LO using the kit that they sent me! I just loved working with these Echo Park papers!

image image

In creating this page, I played with some really fun Spellbinders™ die templates. I recently got back from the Spellbinders™ design team retreat, and came home with lots of fabulous die templates to create with! My first thought was which of my Clip it Ups would house them the best!!?? I decided that my Main Base would do just perfectly! If you are not familiar with Spellbinders die templates, they come in a variety of sizes, so I needed something that will hold all of the sizes in one place! The Spellbinders™ Grand  Nestabilities® are a touch wide, so I clip them slightly to the side of center, to help it to still turn well. But the height is perfect even for the 12 inch border dies!! I have not gotten to alter the one yet, but rest assured… I will!

image

Do you have a die cutting machine? How do you store all of your templates or cartridges? Have you thought about using a Clip it Up When I get my space ready (it’s coming along QUITE nicely!!) I also plan to have a Wall Mount or Swinging Wall Arm near my cutting station so that I can clip up the ones I am using on a particular project and have them in front of me!

So here are some organizing ideas and thoughts that I’ll leave with you today…

*Use the Main Base to clip up your die cutting templates or cartridges.

*If you don’t have a lot, consider using a Swinging Wall Arm or Wall Mount! (both items on sale now)

*Remember that you can use your Jumbo Clip it Up for collections and kits? Keep them in a zip lock bag and hang them up! Are you part of a monthly kit club? Do you have a dozed pizza boxes stacked up? THIS is your solution! Organize them by month and you’ll always have them out in the open and accessible for use!

I hope that I have inspired you today to get organized or to get crafty! Either way…

Happy Scrapping!

Tina

Apr 25, 2011

Mother’s Day Giveaway!

We all have women in our life who we love and cherish.  Simply Renee wants to honor special mothers throughout May.  Email us why a woman in your life deserves some extra attention and then make sure you follow our blog.  In May we'll randomly select different women to blog about and she'll receive a special Clip it Up prize.  Don't miss out on this great way to show an amazing woman in your life you think she is great.

Email us at clipitup@gmail.com before April 30, 2011.

Rules/Regulations

  • Email a picture and a short reason why you think the mom you nominated deserves a Clip it Up product. 
  • All nominations must be received by April 30, 2011 11:59 PM MST
  • Winners will be randomly selected and they will be announced on our blog along with the picture and reason why they were nominated.
  • Prizes will vary and will be announced within the post
  • Simply Renee reserves the right to make changes at any time during the promotion

A mother holds her children's hands for a while...their hearts forever. -- Author Unknown

Quote of the Week

“We may encounter many defeats but we must not be defeated.” ― Maya Angelou

Don't forget about our Mother's Day Contest! Click here for details. 

Apr 20, 2011

A perfect Spring layout

Hello everyone! It's Barbara again. Are you ready for Easter? I can't wait! It will be so much fun to watch my grand-daughter run around collecting eggs! Plus there's the added bonus of eating deviled eggs! Yum yum!
A few years ago my sweet husband made me a huge scrap desk. He installed pegboard for me to hang all my bling,flowers, and alphas. It seemed like a good idea at the time, but I would constantly find that what I needed was all the way at the back. So I would have to take everything off and then put everything back on again. What a hassle! And so time consuming when you have to do it all the time.  He meant well and I love him for it! But I needed a better storage solution.
My two tier Clip it Up solved my problem. On the Upper Tier I store my smaller bling and pearls. I always know where to find my pearls and gems, and they are easy to get to. No more taking everything off and putting it back on.
image
On the Main Base I have items separated into alphas, flowers and bling flourishes. Can you imagine me having to take all those alpha's off pegboard? Pleeeeeease, talk about a waste of good scrappy time!
image
image
Most of my flowers are in ziploc bags separated by color, but I do like to keep the newer ones on my Clip it Up. I want to use them first and this makes it easy to find them, especially since it's right next to my desk!
image
For this weeks project I used the new Jillibean Soup's Dry Mustard collection. The papers coordinate so well and are beautiful. I love that scalloped circle die cut! I focused on making the layout strictly with the paper itself. The hearts were cut out of the patterned paper. I used a punch to create the two flowers, and the centers are Arco Iris flowers made by Prima. I can see me wanting more of those.  On top of the triple loop punch you see the yellow pearls which were easily accessible on the top tier of my clip it up. I made the pleated flower using my Martha Stewart scoreboard and used another heart for the center.
image
Have a wonderfully blessed Easter!
Barbara

Don't forget about our Mother's Day Contest! Click here for details. 

Apr 18, 2011

Quote of the Week

"There is great meaning in life for those who are willing to journey"
-Jim England

Don't forget about our Mother's Day Contest! Click here for details. 

Apr 13, 2011

Family Clip it Up Wall Mount

Hello everyone! I am super excited to share an altered item with you today that I have been working on for a while!!

I don’t consider myself much of an “altered items” type of scrapper. I’d much rather do layouts. But when I get an idea for a project, it consumes me and I really put my heart into it! That’s what happened when I got my Clip It Up Wall Mount. I knew right away that I was going to use it for something other than holding supplies, and I also knew that I wanted to make it so that it was  visible in our house and that I could move it around.

 image

I went to my local craft store and found a piece of unfinished wood with a nice shape (I brought my wall mount to the store to make sure it would fit!). I thought that if I adhered the wall mount to a piece of wood instead of directly to the wall that I could move it around in my house.

image

I painted the wood with black paint, and then a crackle finish and a clear top coat. The letters I cut out on my Cricut using the Storybook cartridge, and the hearts are from a punch. I made sure that my letters would fit between the two end brackets of the wall mount before I glued anything down!

image

You will notice that the Wall Mount is actually mounted upside down. I did this so that the word FAMILY would be easier to see.

For the strands, I purchased some small wooden panels that are about 3”x4”, and some wooden house shapes, too. I painted each of these black and then added some patterned papers to them.

image

The house I decorated with papers and some chipboard pieces. I then printed off my photos 2.25”x3” and adhered them to the panels. I used a strong paper piercer to poke a hole in the bottom the panels big enough for a clip it fit through, but a small drill would work, too.

image

For the words “Live, Love, Laugh”, I used my SCAL program on my Cricut to cut some chipboard and papers to cover them. I covered each word with a few layers of Mod Podge to make them a bit more sturdy. Each word was then glued to a circle punched from paper, and that circle was glued to a piece of ribbon. The ends of the ribbon strip were looped and hot glued so that a clip could hang from them.

image

I made a few bows out of ribbon and hot glued them to the front of the clips. Because of the way the clips are angled when you get them, I had to use a pair of pliers to bend the clips so that my photos would hang straight.

image

I am so SO happy with the way this turned out! I need to find the perfect place to hang this my house. I think I might start working on another one for a Christmas gift!

image

Supplies: Papers: We R Memory Keepers; Ribbon: American Crafts; Chipboard: Maya Road; Punch: Fiskars.

Audrey

***The Wall Mount is on sale now.  Click here to purchase***

Apr 11, 2011

Quote of the Week

"I have decided to stick with love. Hate is too big a burden to bear."
-Martin Luther King

Don't forget about our Mother's Day Contest! Click here for details.

Apr 7, 2011

Show off your kids’ Masterpieces

The Big Question is where to display them???  

Solution...Clip it Up wall products

Kids come home everyday with a backpack full of 'masterpieces'.  As moms we love them, but we don't know where to put them.  The fridge only holds so much. My 4 year old nephew Kaden loves all of his artwork and remembers each one.  He'll dig through the garbage once a day to make sure his mom didn't throw any out. Now everyday after school Kaden hangs up his pictures for display on a Clip it Up Wall Mount

Here are my cute nephews Camden and Brock displaying some of their awesome art work. Letting them hang their own is a great way to involve them in deciding which ones go up and which ones come down.

"Every child is an artist. The problem is how to remain an artist once we grow up." -Author  Unknown

Don't forget that if black is not your color you can always paint it to match the design of your room.

Carolyn ~ Simply Renee

***Don’t forget the Clip it Up Wall Mount, Swinging Wall Arm, and Under the Shelf Rod are all on sale this month***

Apr 6, 2011

Natasha’s Reverse Canvas

Hi everyone! Happy Spring! I am so excited and looking forward to the warm weather. Today I would like to share my first attempt at a reverse canvas. It measures 20” x 20” and is somewhat like a GIANT layout! I had so much fun making this project because I used so many different elements. Below are a few steps describing how I texturized the frame of my canvas.

image

imageSTEP 1: First apply a coat of Claudine Hellmuth Studio Gesso. The gesso acts as a primer and allows the work surface to accept paints and other mediums easily. It also adds a subtle texture to
your project.

STEP 2: After the gesso dries, apply a layer of DecoArt Texture Stucco, a paintable texture. I would suggest allowing the stucco to dry overnight.

STEP 3: Once the stucco is completely dry, paint the texture with acrylic paint. Although the stucco medium is a firm texture, be careful not to chip off any pieces. Apply as many coats of paint as desired.

STEP 4: Next, apply a crackle medium. I used a two-step crackle made by Folk Art. Allow to dry.

STEP 5: Spray the frame with Glimmer Mist and allow the ink to seep between the cracks.

STEP 6: I also added a little Distress Crackle Paint. I randomly painted areas of the frame with the white paint.

STEP 7: Once the paint is dry I coated the entire frame with a clear acrylic sealer. It helps prevent the paint and stucco from chipping. I chose to use a matte sealer instead of a glossy sealer because I wanted the frame to have a worn look. Once the sealer is dry, the surface of the frame will harden and become easier to embellish.

image

All of the chipboard elements, including these ornate corners, are made by The Dusty Attic. I inked these corner chippies with Glimmer Mist and randomly embossed them using Distress embossing powder. I embellished each corner with mulberry flowers as well as floral vines made by Prima and pearl flourishes by ZVA.

image

I used a template to give me the basic shape of this stitched flourish, but I added additional stitches to achieve greater detail.

image

The white ferns are also chipboard elements and were painted white and covered with glitter.

image

This flower is made by Prima and was originally a light blue. I inked it using Glimmer Mist to match my papers. The swirly vine chipboard element was painted and inked in several colors to give it a distressed look.

image

This is the actual cap that my daughter wore in the hospital. :o) I can’t believe how tiny it is! It is amazing how quickly children grow.

image

I tend to do a lot of hand-stitching on my layouts. I love the added texture it adds to any project.

image

To create the masked flourish on the photo, I used a Prima mask and Distress Ink. The pearl flourishes are made by Prima and ZVA, and the green foliage is a chipboard element that was dry embossed and inked.

image

A little lace was stitched beneath my photo to add a softer feel to my canvas. The decorative frame chippie were altered the same way as the ornate corners.

image

This is my twisted lacing technique. I love to add lacing to my projects. You can find the tutorial for this lacing on my blog.

image

The title is made from Thickers alphabet stickers. The smaller letters are foam Thickers that were inked and coated with Glossy Accents to give it a crackled effect. The fence is made out of real wood. I painted it white and inked it to give it more of a worn look.

I really enjoyed working on this canvas. It was slightly different from creating a traditional layout. I look forward to making another one soon... but perhaps not SO large. :o)

Before I go, I’d like to share how I store my paper scrap. Originally, I had my scraps organized in file folders and sorted by color. To be honest, I never once used my file box full of scraps. I just found it to be a pain to sort through all of those little papers just to find the one I need. But then I realized that it was silly to waste an entire sheet of cardstock just to make a tiny flower. I also realized that the problem was how I ORGANIZE my scrap paper. This is when I found the perfect use for the Clip It Up Swinging Wall Arm.

image I installed the Swinging Wall Arm on the wall beneath my desk. I organized all of my scraps by color and placed them in poly envelopes with snap closures. Now I can easily see what is in each envelope. To prevent the clips from sliding off of the poly envelopes, I used Clip Grips. The Clip Grips are fantastic! What I love best about this system of organization is that it takes up very little space. The first photo you see here was taken with the arm in a ‘closed’ position (parallel to the wall). The second photo is the
Swinging Wall Arm in an extended position. Either way, this Clip It Up works perfectly for organizing my scraps! Now I have no excuse for wasting an entire sheet of cardstock. My scraps are now within reach and I am finally using up my stash!

Thanks for taking the time to stop by and read my post. I am looking forward to sharing more projects with you, and I also hope to share more about how I organize my craft studio.

Have a beautiful day!
Natasha

**The Clip it Up Swinging Wall Arms  are currently 30% off through the month of April-hurry and order today**

Apr 5, 2011

How Busy Mom’s Stay Organized

Working full time and being a single mom with a teenage son can be a challenge (in many ways) but staying organized isn't a
problem any more. The one place my son, Mitch, and I always end up is the kitchen.  I decided to put an Under the Shelf Rod under my kitchen cabinet. Can I say I LOVE it!!!! It has been so helpful for Mitch and I. Here is how we organize our crazy life!!

Sunday nights Mitch and I go through our week and anything that needs to be done we put reminders on that day-such as garbage night. I love leaving him notes during the week so I have post-it notes hanging in front. I also hang up our shopping list, bills I need to pay, school papers needing to be signed, and Mitch is even leaving me cute notes. I put a zip bag up for lunch and spending money and when it's empty it's a good reminder he needs money(always empty).

I had to make it cute so I decorated the tabs with  Jillibean Soup-Chilled Strawberry Soup line and inked it with Tim Holtz Vintage Photo Ink. I think the tabs turned out super cute (can't go wrong with great products). Now I'm ready for my busiest days.

Carolyn- Simply Renee 

**Don’t forget the Clip it Up Under the Shelf Rod is currently on sale for only $14.00 (normally $20.00)**

Apr 4, 2011

Quote of the Week

"The future belongs to those who believe in the beauty of the their dreams"
-Eleanor Roosevelt

Apr 1, 2011

Nikki Sivils & Clip it Up Giveaway

One of the best parts of working in the craft industry is meeting all the talented designers and Nikki Sivils is one of them.  I’m sure you’ve all seen her cute products and her new lines are amazing .  Our cute Misty did an adorable layout using the Max & Mollie line. 

Today Nikki Sivils and Simply Renee are doing a joint giveaway.  Visit Nikki Sivils’ blog for details on how to enter and what the great prizes are!

Thanks and we hope everyone has a great weekend!

Tina’s Craft Area Redo: Part 1

Hello all! I can officially say HAPPY SPRING to you now! J I hope you are enjoying the longer days… the warmer sun… and all the fun that goes with it!

As you may remember, I am in the midst of renovations at home here. When things are complete, I will have a scrappy space all my own! I would like to share the journey with you. In doing this, I would like to accomplish several things. I hope that I can give you ideas on how to organize your supplies in a small area. I would like to share with you how to maximize your Clip it Up products. I would like to show you step by step how my scrappy space goes from nothing, to something hopefully fabulous!!

Let me begin by sharing a little bit about this space. We live in an old farm house. It has been renovated several years ago (before we bought it) and I love it. One half of the upstairs was just one big open room. It was all great… until we ended up with 5 kids. 5 kids and 2 bedrooms just do not work well! So… renovations began… (before all 5 kids arrived, mind you! J ) When it is complete, we will have 4 bedrooms… 2 boys in one, 2 boys in another, daughter in her own room and of course… one for Hubby and me! J Also when we are done, we will have an upstairs family/rec room. THAT is where my scrappy space will be! I wanted it to be in a space where I can be with the kids. It is not possible for me to be in a room all to myself… we don’t have the room… but more importantly, I want the children to be with me! That’s why this space will work so well for me!

Let me begin with a photo of the room as it is now. The walls are painted… 2 are a light green… the other 2 are light yellow. But when you are in there… it all looks the same… L I’ve also written in what my plan is for now as to where things will go… just so you have an idea of the layout.

image

Next step… hardwood flooring has to go down… and trim goes on. After that, we’re ready to start the fun part!

Right now while waiting, I have been looking for an old set of kitchen cabinets to use in the room. I would like to give them a creamy white-washed look. I am going for a bit of a shabby/country look to my space. What is not on my Clip-it-Ups, I would like to have behind closed doors. Where it is a family room, I need to try and keep things as neat looking as I can.

I have started to alter my clip-it-up products with this shabby/country style in mind… I began with my mini… here’s what I came up with! Each one will be different… but will keep with the soft pastel color palate…

 image

I began by spray painting all of the parts, even if they were going to be covered my paper or ribbon. Next I traced a scalloped circle onto my Webster’s Pages paper of choice. I cut it out using scissors and inked the edges using Ranger Distress ink. I then adhered a sheer ribbon around the perimeter. This was held in place using Helmar’s Quick Fix Adhesive runner. Holds it perfectly! Next I wrapped patterned paper around the pole. I glued it using Helmar’s Premium Craft Glue and held it in place with some elastic bands until it was well dried. To decorate the top handle, I added a small strip of the gingham patterned paper and more of the ribbon. Pink Paislee chipboard letters inspired me to add the word ART to the handle… topped off with a butterfly cut out from the Webster’s paper! Once it was all back together, I added a section of Webster’s tulle flower ribbon around the base of the pole just for a bit of interest. And Voila!! My first altered Clip-It-Up!! It is SO addictive! I had to refrain myself from just going right at the next one! After all… the kids do need supper! J

If you’re still with me… THANK YOU for reading!!! Join me next month to see how things are going in my space… I hope to show you some flooring completed… and another altered clip-it-up… which one will I tackle next???

I would LOVE to hear your ideas and thoughts! I’m open for ANY ideas!!! I need your advice and thoughts on where you think I should put my floor model? I was thinking possibly in the corner between the cabinets and the long table… I need to keep the bottom empty for now due to babies with grabby fingers! LOL! So give me your thoughts… I’d love to hear them!!

Until Next Time…

Happy Organizing… and Happy Scrapping!!

Tina

Related Posts Plugin for WordPress, Blogger...