

May 30, 2011
Quote of the Week
"Being deeply loved by someone gives you strength, while loving someone deeply gives you courage." Laozi
May 27, 2011
Tina’s Craft Room Update
Good morning everyone! Tina here with a quick little CRAFT ROOM UPDATE!! If you have been following along, you know that I’m in the process (long process) of getting a craft space. If you are just joining us in this journey, you can check out the past post here.
Today I just want to show you where we are at. The room is officially done!! Floor down, lights up, painting done (except for a few touch ups) Check it out!!
Here’s a photo that I shared in my last post… with plans…

And here it is now!

I LOVE that flooring! And the lights are beautiful! Now comes the fun part! Adding my STASH!!

However, I am in the process of looking for cabinets… yes still! Hoping this next week I’ll be able to get something. It’s hard to find used cabinets that suit what I want! If we don’t find something soon, I’m going to have to get them made! But that’s a little harder on the wallet! LOL!
So, while I wait for cabinets,… I have grown impatient. So, my sweet Hubby moved in my old table and I have trucked some of my stuff up! I was getting SO tired of my dining room looking like a Scrapbooking store upchucked in it! ROFL! Seriously! It was getting bad! So here is the beginning of what will be MY SPACE! I have my Main Base set up with my Spellbinders die templates. I also have my Mini with lots of my smaller embellies and ribbons. And there is LOTS of “stuff” just hanging out for now.

Today I’m setting up my FLOOR MODEL!! THAT will get rid of lots of the stuff hanging around! I also have a Wall Mount, a 36” Ribbon Organizer and some other fabulous Clip-It-Up products too make this space as work friendly and organized as it can be!!
So tune in next time to see my temporary work station while I wait for the cabinets… I’ll check back in a week or so with my “temporary” pics…Then hopefully the next post will be my space in its full glory! WOHOO!! It’s getting close!
Thanks for stopping by!!
~TINA~
May 25, 2011
A Few Pages and Bad Habits…
We got to work with a fantastic stash of paper products from some of the best companies the past month and I wanted to share two layouts that I created.
Both of these are based on some Page Maps sketches by Becky Fleck.
This first page is about my 35th Birthday, and I got to play with some of the birthday line from Nikki Sivils and some papers from My Little Shoebox. One of my favorite elements was the “banner” that was actually upside down birthday hats! Too cute! (This also inspired another project that I am working on that you will see in the near future, too! )


This next page is also about a birthday…kind of. I made some “practice” cupcakes for Charlotte’s 2nd birthday, and she has really maybe only had 1 or 2 in her life, so I wanted to make sure she liked them! I used the cupcake line from My Little Yellow Bicycle. I can’t begin to tell you how many different embellishments and extras there are that coordinate with LYB lines….there is just so much to choose from!!!


So having all these great embellies also leads me to one of my bad habits. When I have used a product from my Clip It Up, or I have a new product that I haven’t hung yet, I have been just placing the packages on top of my Clip It Up! Bad, I know. So I am thinking about adding something to the top of my Clip It Up, like just a piece of decorated chipboard, so that I can decorate it and deter myself from piling up all my embellies. I am envisioning a cute little decorated cup or bowl to keep some clips in so that I can just reach in and grab a clip, add it to my product, and “Clip It Up”!

On a side note, remember that little video (click here) I shared with you of my scrap space about two months ago? Well Bye-bye scrap room….we are making a nursery for Baby #2 which will be here sometime in early August! J
I have set up shop in our large game room/family room upstairs. I purged a lot of stuff, but my organizational strategy is still pretty much the same. I feel great about my new space and it has allowed me to work in the same room with my little one as she plays and while hubby watches TV! 


Thanks for reading my post today and next month I am going to use my stash on my Clip It Up for a layout, and ONLY things on my CIU…should be fun!
May 24, 2011
Spring Quilt Market 2011
The Spring Quilt Market was a huge hit. We didn’t have to travel far since it was held in our home state of Utah.
This year we were without Renee because she was in Hershey, PA for her son’s graduation from Medical School. Congrats Dr. Nathan Hull!!!!
Bobbi, Carolyn and Kathy did the show!!!! Since our products hold so much, we’re especially grateful for Riley Blake Designs, Lecien, Button Galore, Kati Cupcake, Izzy and Ivy Designs, Atkinson Designs, and The Fiber Goddess for sending products for us to display!!!! Take a moment to check out their websites and new products - they are amazing companies!

Setting up is always the hardest part, but the end result is always worth the effort. It takes 2 days to set up and 2 hours to take down :)

After Bobbi and Carolyn set most of the booth up, Kathy came in and worked her magic on the decorations. People loved our booth and said it had a steam punk feel to it. They loved all the junk with the fabric flowers in the mesh!!! Kathy’s quilt was a huge hit, she is amazing and so talented and we are so happy to have her helping us at the shows. She also did the Schoolhouse class on “Don’t Agonizes Organize” Thanks to all that came and to Kathy for doing a great job!!!!


Renee and Carolyn found the metal springs and other rusty old junk at Smith and Edwards after hours of digging. One of our many fun finds.


Our New All-In-One coming in August.
We always say we are going to be really good about taking pictures at the show but we get busy and forget. So here are the couple that we took. Yes, Bobbi and Carolyn did work but they also did a great job of avoiding pictures :)

Kathy sharing our products with store owners.


Kathy and talented authors, Ruth and Liz.
We had so much fun and enjoyed seeing old friends. Our favorite part of the show is meeting and spending time with many talented and sweet people .
We hope to see you all at the Houston Fall Quilt Market in October!!!!
Simply Renee Team
May 23, 2011
Quote of the Week
“Anyone can hide. Facing up to things, working through them, that’s what makes you strong.”
― Sarah Dessen
― Sarah Dessen
May 18, 2011
Garden Party and the Clip it Up Wall Mount
Hello again! Natasha here with a Spring layout to help celebrate the beautiful weather we have been having lately. For this layout I used the 'Garden Party' Collection that was generously donated by My Little Shoebox. This layout is a little different from my normal style, but I adore this paper collection and my daughter was thrilled with the end result. :o)


For the title I used alphabet stickers made by My Little Shoebox and American Crafts. Around the title I added coordinating cardstock stickers that were embellished with a little Stickles and bling.

The cute little toadstools, the butterfly (see below) and the leaves are all chipboard elements made by The Dusty Attic.


All of the stitching on this layout was done by hand. The blue frame was made using a punch and I added stitching for greater definition. I created a vertical border on the photo using eyelets and added an embossed layer behind the photo.

Several different punches were used on this layout to create a variety of borders. The layers of the chipboard butterfly were split to create a 3D effect.
Aside from the adorable Garden Party paper line, I also received the 'We Are Family' Collection by Nikki Sivils.

I used these papers to decorate divider tabs for my daughter's Clip It Up Wall Mount.
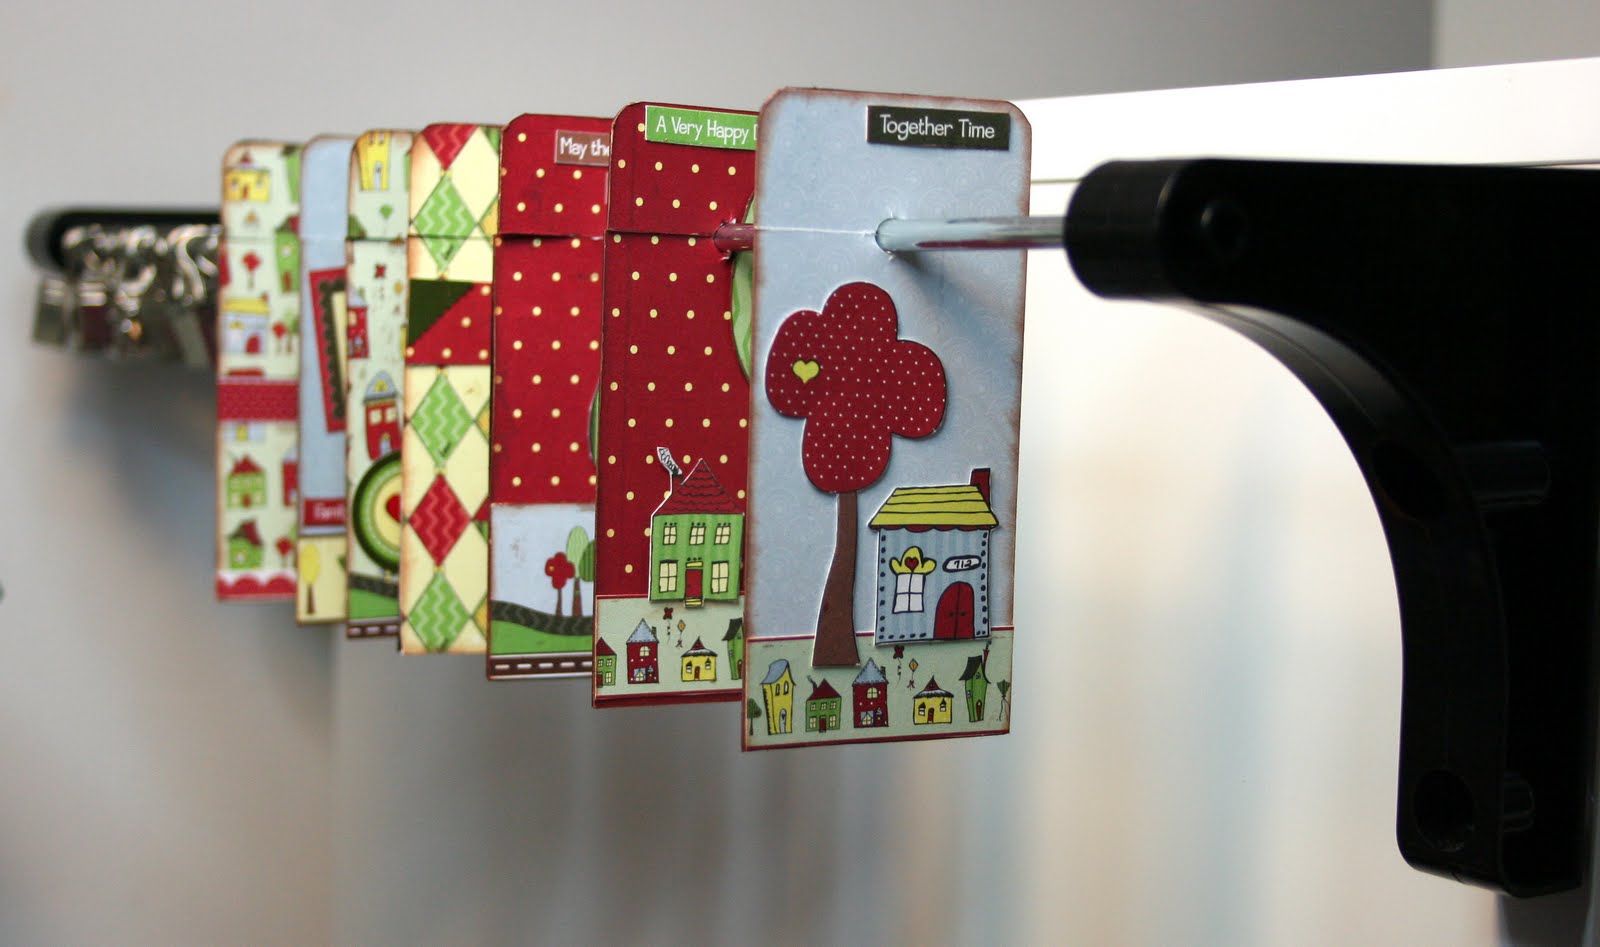
My 5-year-old is an aspiring artist/scrapbooker and creates numerous works of art for me on a daily basis. I installed the Wall Mount for her so that she would have a way to proudly display her artwork.
Before I go, I would like to show you a quick peek at how I organize my embossing folders. In the past I stored them in a box, but I would always forget which folders I have in my stash.


There are numerous uses for each of the different Clip It Up products. While you are doing your Spring cleaning, take a look around your home and take note of where you could use a Clip It Up to help you get organized.
May 16, 2011
May 11, 2011
When I grow up I wanna be a Grandma!
Hi Everyone! Misty here today to wish you a WONDERFUL Wednesday!!! And Happy "Hump" Day! LOL While I am continuing on my self imposed torture of organization...(Ooops, I mean my mission! LOL), I have found that I have a lot of older photos that I still haven't scrapped that have been tucked here, there, and everywhere.
I started tossing them into a basket as I came across them, and before I knew it, I had a basket FULL of photos! Now, I know most of us have gone digital, but I am sure most of you can relate to having a basket, box, or bin of unscrapped 35mm photos tucked away somewhere, right? I am going to give you a "Tiny Tip" on what to do with those photographs today.....ORGANIZE THEM!!!

Organized photos=scrapped photos.
I wanted to keep them in this basket so that it could stay within arms reach. SO, I pulled out my handy dandy Clip It Up Tabs & Labels that came with my jumbo and I set to work! These tabs are the PERFECT answer to my photo organization woes! I used the labels that came with them and started jotting down the events that the photos encompassed. Before I knew it, my photos were organized and I had a basket full of Memories just BEGGING to be scrapped!


I really wanted to scrap some photos of my Grandmother that I came across during this process, as she has been gone now for seven years and I miss her dearly. I had the photos ready to go, and then I realized that I need to make copies for my Dad and give them to him for Mother's Day. SO, instead of scrapping THOSE photos, I did this one....


It is of my Step Mom and my 5 year old talking about the page that my daughter had just finished coloring. Every time I look at it, I remember how my grandmother did such things with me, and, oh, how I loved her. So, in honor of these memories, Mother's Day, and my own Grandmother, this layout speaks what my heart has been saying to me all along.
"When I grow up, I want to be a Grandma."
I am so glad that I decided to organize those photos, and that I came across the ones of my Grandmother. My Dad was very happy to get them, and My Step Mom adored the layout. Remember...ORGANIZATION is the key to success! Get those photos organized! You just might come across one that speaks to your heart like mine did!
May 10, 2011
Check out Prima’s blog
On May 9th’s post Sharon Laakkonen has decorated a Mini Clip it Up storing Prima’s flowers in her Craft room. Here is the link http://prima.typepad.com/. It’s so fun to see how people change the Clip it Up to fit their style. Love her sneak peeks of her room.
May 9, 2011
Quote of the Week
“What do we live for, if it is not to make life less difficult for each other?” ― George Eliot
May 8, 2011
Happy Mother’s Day- Drawing!
We all have mothers in our lives that we value and look up to. Some of us are mothers ourselves and we know that being a mom is one of the hardest jobs in the world yet the most rewarding!
Linda Freeman wrote the following about her mother, Louise Ford:
“She is the nicest mom I have ever met. I am a grown woman so I have met many in my life. Mom loves everything in it's place, so I know a Clip It Up would be right up her alley. My Mother is kind and giving to everyone she knows. She is selfless, supportive and never complains even when she doesn't feel well. I love her more than life itself and tell her I love her often. She volunteers at the local mission serving food on Sunday after church whenever she can and when my husband and I are at work, she comes over to let our dogs outside even in the rain or snow. What I would do without her I don't know and I never want to find out. My Mother deserves to be recognized everyday but a special recognition would be wonderful.”
Congratulations Louise, your daughter nominated you for our Mother’s Day drawing and you are the very well deserving winner! We’re sending you a Clip it Up Jumbo!

Happy Mother’s Day to Louise and all the other wonderful Mothers! We hope you have a fun and relaxing day.
May 6, 2011
Altered Clip It Up Products- Vintage & Grunge Minis (Part II)
Hello again! Natasha here and I am back to show you the details of my Grunge Clip It Up. Last week I showed you my Vintage Clip it Up. If you missed it, you can view the details here.


Like my Vintage Clip It Up, this Mini and Upper Tier were sprayed using a stone-texture paint. The brick wall panel and the tribal element are chipboard elements made by The Dusty Attic. The sprocket gears are from Tim Holtz’s Idea-ology collection and are one of MANY Tim Holtz products on this Clip It Up. The large flower shown here is handmade. (You can find a tutorial on my blog.)

I used hemp cord and added lacing around the base. I really love how it turned out! The hemp cord adds such a beautiful texture.


The letters that spell out ‘INSPIRE’ are made of grunge board. Each letter was dry embossed for added texture and then painted and inked to match.

Here you can get a glimpse of all of the Tim Holtz goodies I used- the ball chain, clear charm fragments, grunge board, Lost and Found paper collection and word key. I can’t get enough of Tim Holtz products!

To add interest, I wrapped hemp cord around each arm and each divider tab.

Can you guess which products I will be hanging on this Clip It Up? That’s right! Tim Holtz products!
It is so easy and fun to personalize Clip It Up products to match your decor or craft space. I think the most difficult part for me was having to temporarily place my supplies back in a box while I completed my alteration LOL. It is difficult to take a step backwards after experiencing the convenience and ease of a Clip It Up.
Thank you so much for taking the time to read my post. Hope you decide to personalize your own Clip It Up, and if you do, please send us a photo! We’d love to see it! Let your imagination go wild and have fun with it!
Have a beautiful day!
Natasha
Subscribe to:
Posts (Atom)


