Jul 27, 2011

Review Time!!!

Hi!  This is Misty Willis...and I am going to give a review of a couple of my Clip it Up units today. 

First, let me just say I LOVE LOVE LOVE my units!  I have the 36" Ribbon Organizer, the Main Base, the Jumbo and the Upper Tier.

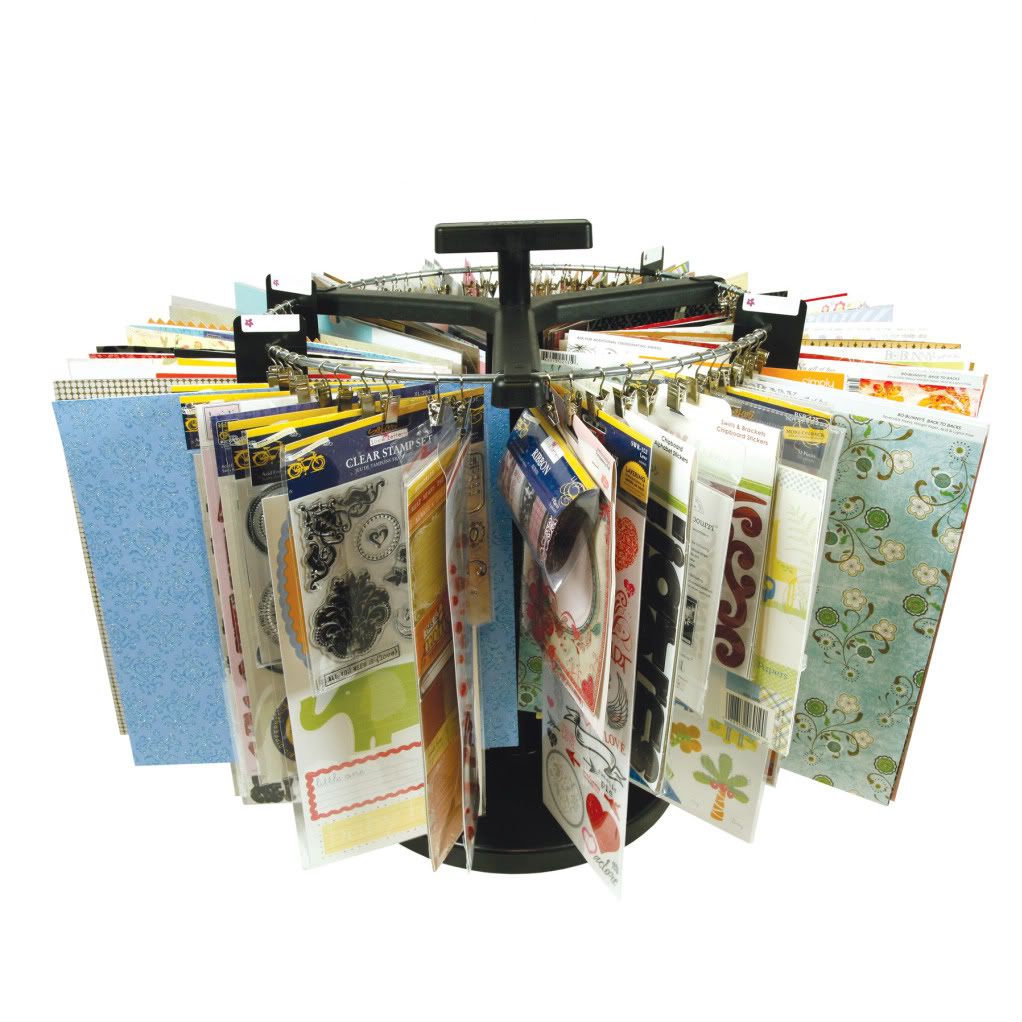
I am reviewing the Ribbon Organizer and the Main Base today, along with the plastic tabs.

When I stumbled across the Simply Renee site a little over a year ago, I was in awe of the amazing products.  When I was chosen to be part of her Design Team, I was beyond thrilled!

I am an avid scrapbooker with LOTS of "stuff" that needed organizing.  I was able to utilize my Jumbo and Upper Tier to organize most of my embellies pretty easily.  This thing holds a TON of stuff, and I keep it right on my desk in plain sight so that I can grab whatever I want or need easily.  LOVE it.

_MG_4925 Even more than my need for scrappy organization, however, was my need for Ribbon organization.  I have an insatiable LOVE for ribbon.  Not kidding.  It is sooooo pretty and there are sooooo many things that it can be used for.  And...I have a TON of it.

Here is how I used to store my ribbon....in several large containers just like this one:

_MG_4895

When Renee sent my 36' Ribbon Organizer to me, this is what my jumbled mess became...

_MG_4897

Once it was organized and in sight, I was able to actually SEE what I had, what I needed, and what I had duplicated! LOL

I began creating bows, headbands, purses, scrapbook layouts, cards, and more...and almost everything I do has ribbon on it.

_MG_4881

_MG_4883

_MG_4867 _MG_4529

   Made possible by the ability to see it all displayed on my Clip it Up.   I began creating SO MANY bows, that I had to quit giving them to my daughter because she will never wear them all!  SO, I decided to start hanging on to them and giving as gifts to the many little girls I know...but where/ how would I store them to keep them from getting crushed? 

SOLUTION: My Main Base!   I used the tabs as hangers.  I punched two holes in the tab with a one hole punch and I stuck the clips through.  PERFECT!  I now have a perfect place to store the bows that I make!  They are even hung up nice and displayed beautifully! 

_MG_4899-1 _MG_4901
So, I guess what I am trying to say, is that I would be lost without my units!  I love every one that I have, and can think of a hundred more uses for them!  The organization possibilities are endless when it comes to Simply Renee and Clip it Up!

Misty

Birthday sale going on until July 1.  Go to www.clipitup.com use coupon code: Birthday5  for 30% off

Jul 25, 2011

Quote of the Week

"It is amazing how quickly the kids learn to drive a car, yet are unable to understand the lawnmower, snowblower or vacuum cleaner."
---Ben Bergor

Jul 20, 2011

Craft Space in Waiting

Hello Everyone!

It’s Tina  here, as promised! I’ll try this again… I had my post almost finished and my program froze… poof! All gone! Grr… So yes, saving as I go now! :)

Alrightie, Today I have a few of things to share with you. I’m going to share a couple of changes made to my “craft space in waiting”… I have a project to share, my Floor Model and a problem!

Let’s begin with my Floor Model! I was SOOO excited setting this up! It took very little time and was very easy to set up. I did it all by myself… except I did get my Hubby to tighten everything just to make sure it was good and secure.

Once I set it up, I took everything that I had on my Main Base and Upper Tier and put it on ONE ring! (You’ll see my Main/Upper below) I was blown away by how much just one ring would hold! All of my alpha’s, all of my flowers and a bunch of embellishments! Check it out!

 Floor Model

On the second ring, I added a bunch of papers. No this is FAR from all of my papers. I have lots more to go thru and add! However, I did add a lot of my collections! Basic Grey, Echo Park, Fancy Pants, Webster’s Pages… I LOVE to buy collections! But my problem is that once I buy a new one, I forget about the older ones! They used to get stacked in a box! No more! Now they are out where I can see, admire and USE them!

Speaking of using them, check out this layout I created of my adorable daughter!

I Hope You Dance

On this page, I used products from all of my Clip it Up products that are presently in use… my floor model held my papers, my alpha’s and my Kaiser craft wood lamp post. My Main Base held my Spellbinders die templates, and my Clip it Up Mini held my flowers.

I Hope You Dance details

I Hope You Dance details 2

I did discover a problem however. Check out these Easter buckets…

buckets-1

I need a better storage solution for my inks, sprays and paints! I am waiting not-so-patiently for the Clip it Up Tray to be in stock! THAT is the perfect solution!! I’ll be the first one in line!! Don’t try and fight me either! LOL!

Before I sign off, I also want to share with you one other change I made since my last post. I added the Upper Tier to my Main Base. My Main Base is used for Spellbinders Die templates. I have a lot of stamps that coordinate with those dies, and wanted to keep them close by. So they are hanging on the Upper Tier, directly above the die templates!

 Upper Tier

I am still working away on my craft space… I am super excited as we are going looking at cabinets this weekend!! I have a good feeling! And they are SO perfect! They need some work but I think they will do the trick wonderfully!!

So, tune in again soon and I’ll keep you posted!

Until next time,

Happy Scrapping!

~TINA~

Jul 18, 2011

Quote of the Week

You must look into other people as well as at them.~ Lord Chesterfield

Jul 13, 2011

Angels and Flowers!!!

Hello everyone, it's Barbara again.

Today I want to show you how I use one of my Clip it Up Wall Mounts. In an earlier post I told you how I separated all of my older flowers by colors, and placed them in baggies. Well, what I have done is place the colors I most frequently use on the Wall Mount. And I have found that I am using them more often. In fact, a few of the bags have gotten quite thin compared to what they were when I started. And as they thin, I am able to put another color on.

Here is the Wall Mount:

028 
For today’s layout, I used papers donated by My Little Shoebox. I added some older Prima flowers which were on my Wall Mount. The centers are some Fantastic Findings buttons. I used green cardstock and a Spellbinder Nestability for the leaves. Almost all of the punches used are Martha Stewart, except for that tiny butterfly. Well here's my layout. I hope it inspires you, and that you have a wonderful Wednesday!

ciu blog

Barbara

Jul 11, 2011

Quote of the Week

Ask yourself this question:"Will this matter a year from now?"
~Richard Carlson, writing in Don't Sweat the Small Stuff

Jul 8, 2011

Winner of Birthday Contest with LYB!!!!

Congratulations 
Mary Ann Jenkins
 Winner of the Birthday Contest with LYB!!


Email us with your information.  Thanks LYB for the Fun contest your awesome!!!  Go check out LYB's Blog to see who won.  Keep checking in with us for Birthday celebration all month long!!!  

 30% off at www.clipitup.com
 use promo code: Birthday5
(retail only end July 1)

Happy Shopping!!!
Simply Renee Inc.

Jul 6, 2011

Happy Birthday Clip It Up and Little Yellow Bicycle Style!!!!

I am so excited to share some photos with you of an altered Clip it Up I made using the Little Yellow Bicycle Cupcake Love line.  I spent a TON of time on this, and I am so happy with the way it came out.  My daughter's birthday was on May 16th, and she turned 2, so I based it around that theme, and the "cupcake" theme from the papers.

CIU-cupcake-and-party--stan

I used two paper mache hat boxes from my local craft store and painted them white and put a crackle and glitter finish on them with a clear varnish.  I used some of the Little Yellow Bicycle sprinkle stickers and decorated the edges.  I found some beaded string that I draped around the cakes and I made the "Happy Birthday" banner from Little Yellow Bicycle papers.  There is a "cupcake Love" banner, too, on the other side, but I forgot to photograph that.  That came in one of the packages of stickers from  Little Yellow Bicycle.  I added some trim to the base of each cake tier.

cake-tiers

cakes-and-cupcakes

The #2 on top of the stand was covered in Little Yellow Bicycle  paper and is glued to some spools which I painted white to give it a bit more lift.  I used some floral picks from the craft store and drilled a hole in the top of the two and glued them in to make a splash of bling from the top of the stand.  These tiers are meant to hold cupcakes, of course!  :)

2-1

This was a great excuse for me to make some yummy vanilla cupcakes.  I used the "Cupcake Wrappers" cartridge for the Cricut to cut the wrappers and the scalloped circles for the cupcake picks.  I used stickers from the Little Yellow Bicycle embellishments to decorate each pick and added them to the cupcakes.  Some of the wrappers are decorated with some lace crape paper from Little Yellow Bicycle, too.

cupcakes

For the Main Base Clip it Up itself, I painted it white and added some ribbon down the center pole.  I used a scalloped circle paper from Little Yellow Bicycle for the base, which fit perfectly, and them added trim around the outside edge of the base.  On the metal circular bar, I strung some sparkly star garland, and added three large white bows to each end of the arms of the top of the Clip it Up.

clips-with-ribbons

The "cones" are meant to hold party favors, but they are actually party hats!  I used my SCAL program to cut them on my Cricut, added a pom pom to the top, some ribbon trim around the edges, and some pretty elastic ribbon to go under your chin!  Each hat is held by a clip which has a white bow tied to it.

party-hats

It really turned out just as I had imagined it, although it is much taller than I thought it was going to be!  :)  Charlotte had such a fun time at her Birthday and the stand was a big hit.  But NOW what am I going to do with it?  :) 

IMG_6372

Thanks,

-Audrey

Happy 5 th Birthday Contest!!!!

We have teamed up with Little Yellow Bicycle for a chance to win product from both of us.

Tell us your most creative Birthday project then go to Little Yellow Bicycle and leave a comment too. Facebook fans leave comments on both our walls for double the chance to WIN!!!

Good Luck!!!  Winner will be announced July 8th

Happy 5th Birthday Sale 30% off

July 6 through July 31.

Use coupon code :  Birthday5

www.clipitup.com (Retail Only)

Jul 5, 2011

Winner Of the Father’s Day contest!!!

Congratulations!!!!

Melissa said...

This would be great for my dad to keep all of his woodworking supplies organized! It would also be fabulous for keeping nuts, bolts, screws, washers, etc. organized. Thanks for the chance!

We hope your dad enjoys his new Jumbo Clip it Up!!!

Melissa  email us your information.

Happy Organizing!!

Simply Renee Inc.

Jul 4, 2011

Quote of the Week

When one door of happiness closes, another opens, but often we look so long at the closed door that we do not see the one that has been opened for us.
~Helen Keller

Jul 1, 2011

It’s Our 5th Birthday!

July is our birthday month and we’re in the mood to celebrate!

Keep checking back with us for sales, give-a-ways, contests with other great companies , fun blog posts, and some trips down memory lane with some Clip it Up photos.

Here’s a sneak peek…

image

of the fun blog post and contest coming up with My Little Yellow Bicycle!!!

Have a wonderful 4th of July weekend!!!

We would personally like to thank all those who have fought and are still fighting for the freedoms we enjoy each and every day in this country!  Thank you and God bless you and keep you safe!

Simply Renee

Related Posts Plugin for WordPress, Blogger...