

All I can say is....why didn't I get one of these sooner! Here is the 36" Ribbon Organizer that I got a couple of weeks ago. Right now, I am using in on my table before I move into my new scrap room and it works this way too! Only problem is that you can't use the bar below for your clip-it-up needs until you hang it on the wall.

If you're anything like me, you love to buy trim by the yard, and you have quite a bit of it, sitting in a tub somewhere! When I got my Simply Renee Ribbon Organizer, I immediately thought of my trim. How could I organize my trim in an attractive and practical way?

Well, I am happy to say that I do have a couple solutions to share with you and a mini-tutorial on altering your trim.
1. Create Your Own Ribbon Rolls
2. Wrap Your Trim Around Existing Ribbon Packaging, or Make Your Own With Chipboard
3. Misting Your Trims Ahead of Time With Colors You Love
HERE IS THE MAKE SHIFT RIBBON ROLL:
Supplies:
Paper Towel Roll
Tape
Trim
Scissors
Labels (optional)

Step 1: Depending on the width of your lace/trim, but a piece of paper towel roll a little larger than the width of your trim.

Step 2: Tape one end of your trim to the roll and start rolling it up!

Step 3: If you like to keep track of who makes what product, then simply print out a label and paste it on the inside of your new roll.

Another example:

Step 4: KEY to this working....you will need to place your hand made rolls in between regular ribbon rolls to keep them in place. See below for example.

Now that we have one solution for trim, let's get to another one! This idea uses the clip-it-up section of the Ribbon Organizer.
WRAPPING TRIM IN STYLE:
Supplies:
Large Chipboard Pieces
Acrylic Paint
background Stamp
Staz-on Ink (or other)
Trim
Tape
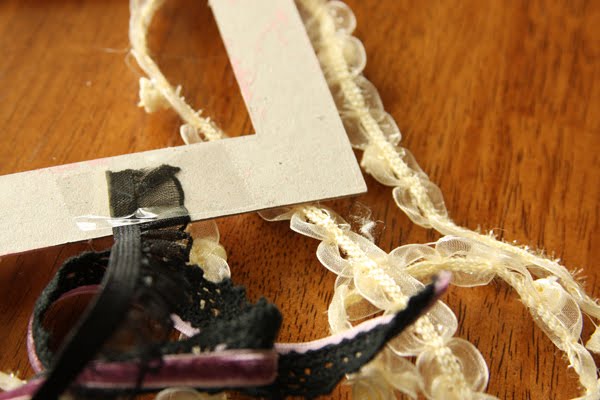
Step 1: Decorate your chipboard piece by painting one coat of acrylic paint, let dry, then stamp a background stamp with Staz-on ink.

Step 2: On the back, start taping your trims, and wrapping them around the chipboard one by one. Keep in mind that your clip will need to go in the middle to keep it hanging straight.

Step 3: Continue until you have covered your chipboard. Use tape or a pin to secure the ends of your trims, whichever you find easier. You are now ready to clip-it-up to your Ribbon Organizer in style!

AND you can also use old ribbon packaging boards, DON'T THROW THESE AWAY! I took some Christmas ribbon on a board from DCWV and just wrapped on my own trims. These boards are made for ribbon, so you should remember that you can hold on to these for your Ribbon Organizer.

The Final Look:

And now onto a little tip. I tend to buy white or cream trims and laces because I like the flexibility I have to spray them with whatever color I need, now that Glimmer Mists and Shimmerz sprays are available.
ALTERING YOUR TRIM/LACE:
Supplies:
White/Cream Trim/Lace
Glimmer Mist or Shimmerz Spritz Sprays (or similar)
Old Box
Step 1: Lay your trim/lace down on the inside of an old box and cover with glimmer mist of your choice. You can try blending 2 colors if you like!


Step 2: Hang to dry over the box.

Step 3: Roll onto your own ribbon roll and be prepared to use your newly colored trims and laces on your projects.

And here is an example of using the trims and ribbons on a layout. I like to stack them for a little more texture!

Below is a close up of the trim I sprayed with Glimmer Mist (the blue one and the brown one).

I like to place my title on top of lace and ribbon to create more dimension.

Hope you had fun reading and hopefully you found some useful organizational tips!
Layout Supplies:
Paper: My Mind's Eye, Bo Bunny, 7 Gypsies
Trims: Prima
Ribbon: Offray
Rub-ons: Basic Grey
Mist: Tattered Angels Glimmer Mist
Stamp: Unity Stamp Co. (Memory Block)
Ink: Tsukineko, Ranger
Letters, Flowers and Pebbles: Prima


Thanks for the great tips!! Now I just need to get a Clip it Up Ribbon Organizer!! ;)
ReplyDeleteGreat ideas Lesley! I too buy most of my ribbon and trims by the yard... ove your tips!
ReplyDeleteand your layout is fabulous!
What an awesome post!! Love how you organized your ribbon! I also love the Glimmer Mist on the lace! Beautiful!!
ReplyDeleteWhere do you find Glimmer Mist?
ReplyDeleteThanks ladies! Gina - Glimmer Mist is made by Tattered Angels, and there is also a product called Shimmerz Spritz that would do the same thing. I bet you could find these at most scrapbook stores and most definitely on-line. My favourites are the blues (Turquoise, Frozen Lake and Patina from Tattered Angels) and Eucalypstus from Shimmerz. I 100% endorse these products!!!! Love them.
ReplyDeleteWhat a fabulous job! I loveeee watching how you created your own ribbon roll solution and your misted trims are so fabulous! Your layout is just stunning!!!
ReplyDeleteWhat a beautiful layout! Thanks for sharing all the great ideas; love the glimmer mist on the lace!
ReplyDeleteI never thought to spray them...will start doing so, espec since white and cream lace are the cheapest!!! Thanks for all the different ways to store; I love using large manilla tags and then adding ribbon by color (reds and pinks, whites, greens, etc)
ReplyDelete